CanD Botanical Works
Field guide • 01
Carrie + Dustin's propagation field guide
From one beautiful plant, many.
A visual, practical path from a clean mother plant to strong rooted cuttings—built for your first sellable crop.
Cutting length3–4 inSoft growing tip
Root-zone trial65–72°FMeasure, then adjust
Typical rooting10–21 daysStage gate decides
Pilot success≥ 80%Healthy rooted liners

What you are making
A cutting becomes a crop.
Your harvest is not the flower—it is a clean, actively growing stem tip. With moisture, oxygen, warmth, and patience, that tip builds its own roots and becomes an independent plant.
- 01Harvest
- 02Root
- 03Build canopy
- 04Finish
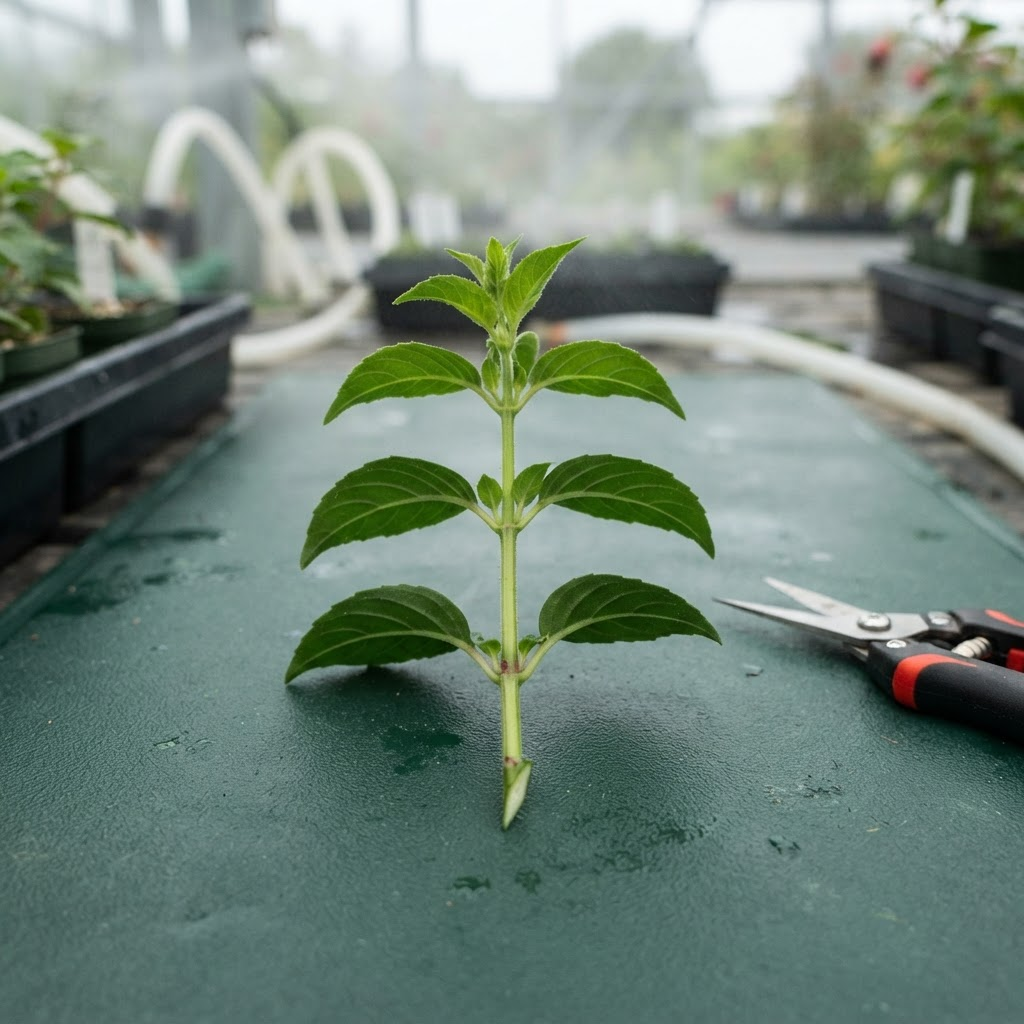
Know what to harvestKeepGrowing tip and 2–3 upper leaf pairs RemoveBuds and the lowest leaf pair CutCleanly just below the lowest node StickOne bare node beneath the media
The ideal cutting
Look for fresh, non-flowering growth that bends without snapping. The node—the point where leaves meet the stem—is the critical landmark.
The working method
Six stages, in order
0 of 6 understood
- Sanitize snips and hands. Prepare labels and moist media before cutting.
- Select a non-flowering shoot with soft but sturdy growth.
- Cut a 3–4 inch tip directly below a node. Place it immediately in a clean, lightly damp container.
Pass condition
Cutting is turgid, clean, non-flowering, and has at least two usable nodes.
Stop and checkNever leave harvested shoots in sun or dry air. Process promptly so they do not wilt.
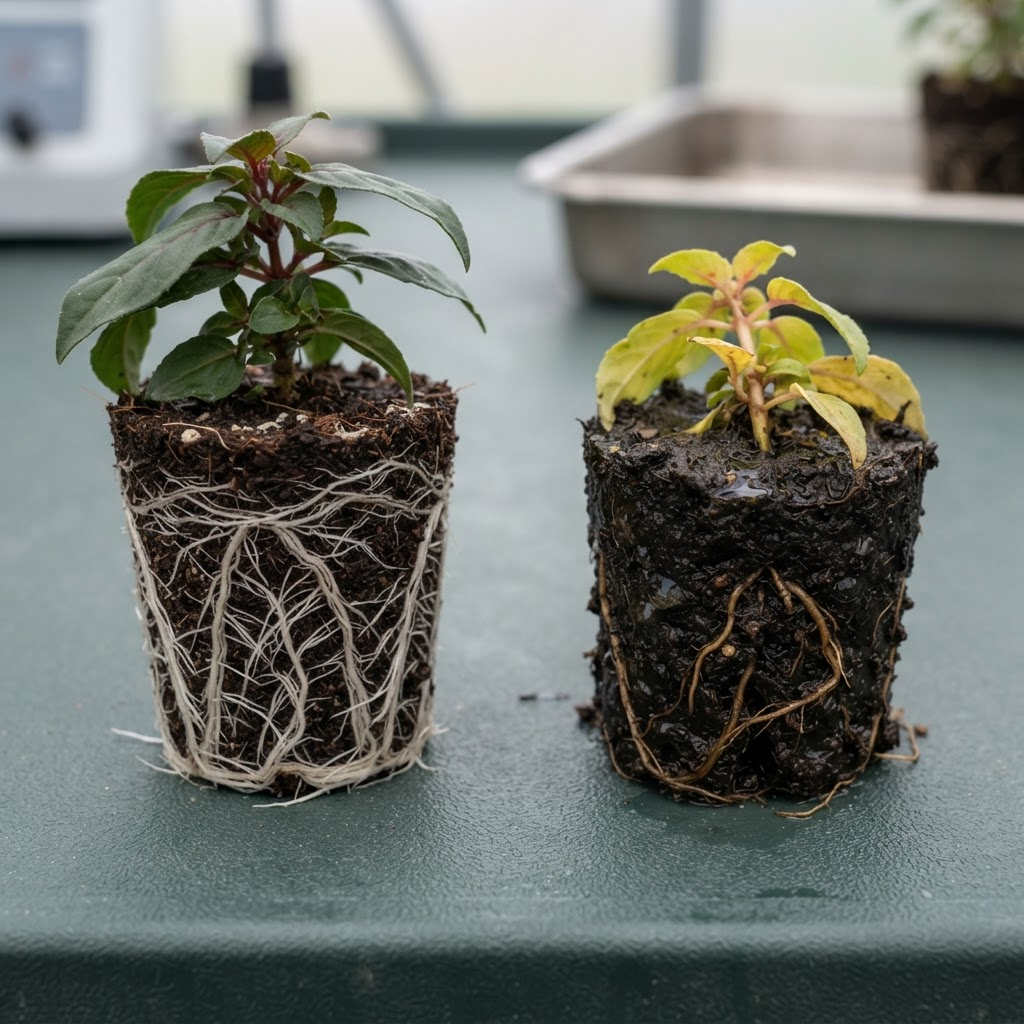
White and branching wins.
Healthy new roots are pale, fine, and spread through media with air spaces. Brown, sparse roots in glossy saturated media signal that water is replacing oxygen.
Healthy: pale roots, intact plugRisk: brown roots, sour or soggy media
What Carrie and Dustin check
Turgor, media moisture, temperature, condensation, fallen leaves
Heat and direct-sun risk; vent before the crop cooks
Record issues, remove debris, verify labels, sanitize tools
Sample only a few plugs; never disturb the entire batch
Set up before you cut
- Known, legal mother stock
- Fresh propagation media
- Sanitized cells or trays
- Sharp snips or sterile blade
- Plant-safe tool sanitizer
- Waterproof cultivar labels
- Clean humidity cover or mist
- Thermometer and moisture log
- Disposable gloves
- Isolation bin for rejects
Learn before you scale
Run a 24-cutting practice batch
Use one legal, correctly identified cultivar. Divide it into two groups of 12 and change only one variable—for example, humidity cover versus intermittent hand mist. Record sticking date, rooting date, losses, root quality, and notes.
Green light: 20+ healthy rooted linersReview: 16–19 healthy linersStop: rot, pests, lost labels, or under 16 liners
Every batch needs a memory
Record before scaling
Batch IDCultivarMother sourcePatent/license checkCut dateQuantity stuckMedia lotRoot-zone temperatureFirst rootsRooted countLoss reasonTransplant date
Continue learning
References
Use these as learning resources, then let your own batch records settle cultivar-specific decisions.